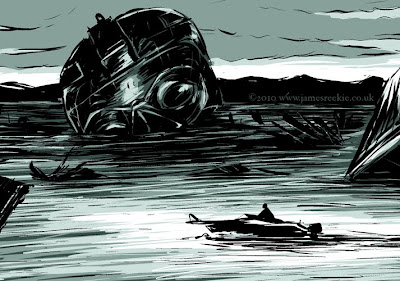
Crop from "Sea wreck", line art and colour in Manga Studio
Early last year it became clear that I would spend some time leading a nomadic lifestyle. I realised that a scanner was not going to be travelling with me and so I had to find an alternative to drawing "for real". I tested out a few applications and found Manga Studio. I haven't looked back since. I love working digitally, I love the line quality, the quick resizing and alterations in the drawing stage, being free of piles and piles of paper and scanning and, most importantly, the blessed "undo" button.
Of course Photoshop has all these tools too, but I just liked the way Manga Studio was set up and how the tools reacted to the way I draw. The pencil and pen tools specifically just felt great from the off. To me, Photoshop is a bit clinical and just doesn't feel right for drawing.
So, after producing my line art in Manga Studio I would export the image and jump straight into Photoshop. To be honest, I'd never tried out the colour tools and completely glossed over them when learning the program.
A weeks or so ago I was asked via email, "Why don't you colour in Manga Studio?". Good question I thought. I used the excuse to upgrade to the Expert version of the software (my goodness, it's so much better! So many more tools! If you're using Debut version, seriously consider switching!) and knocked up an image to play with.

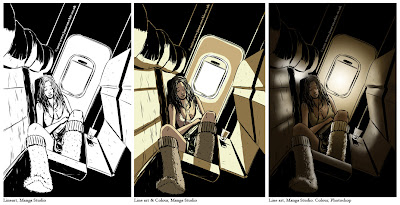
Test image. Drawn in Manga Studio, colour test in Manga Studio then Coloured using the airbrush tool in Photoshop
After penciling and inking as usual I used the Magic Marker tool to colour the image. I found it quick and easy, isolating large areas and using the pen tool to add in some detail. I then went back to the original line art and coloured as I would have done in Photoshop using gradients and the airbrush.
Initial conclusions are... well, it's a different look, more of a classic hard edge colour comic book style. I felt this was perhaps a bad test as the extreme light suited the airbrushing. I tried to get a similar effect using the blur and pencil tool but... it didn't really work!
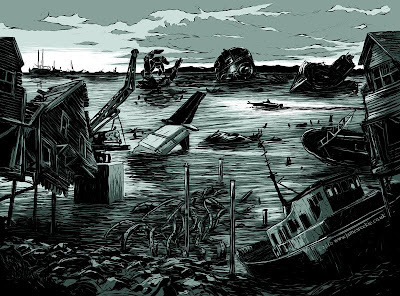
I pushed on to the first in a series of concept images I'm doing for a new project. I drew up the ink line as usual and dropped a dark slate colour over the image. I worked back into the colour using the pen tool and I must admit I am really pleased with the way this one turned out.

"Sea Wreck" Artwork produced in Manga Studio
In this case the hard edge really suits the image, picking out all the sea ripples and the textures on the wrecks. As with all tools, digital or otherwise, you are always learning new things about them and ways to use them. In the future I'm definitely going to play with the colour in Manga Studio more and am not going to default to Photoshop for all my colour artwork. Having said that, stick an airbrush tool in Manga Studio and Robert's your mother's brother...!
